Quick Start
Start in the TUI, run a real command, run a workflow, then use CLI fallback for automation.
Estimated time: 10-15 min
What You Will Learn
- Use the TUI layout, focus movement, and help affordances with confidence.
- Import a catalog and discover commands through the interactive TUI path.
- Run a command and verify results in the logs and result views.
- Run a workflow end-to-end with structured inputs and step status.
Install Oatty
Install Oatty with npm for the fastest setup.
Run `oatty --help` to verify the install.
npm install -g oatty
oatty --help
expected The `oatty --help` command prints usage and exits successfully.
recovery If the command is missing, restart the shell and check your PATH. For source builds, run from the release binary path.
fallback Alternative installation: If npm is unavailable, build from source: `cargo build --release` and run `./target/release/oatty`.
Launch the TUI
Launch the interface with `oatty` in your terminal.
Identify the left navigation, main content pane, and the hints bar.
oattyexpected The TUI opens with visible navigation and an empty Library view.
recovery If the UI does not render correctly, increase terminal size and relaunch. If colors are unreadable, verify your terminal supports 256 colors.
advanced Power-user affordances: `Ctrl+L` toggles logs and `Ctrl+T` opens the theme picker when enabled.
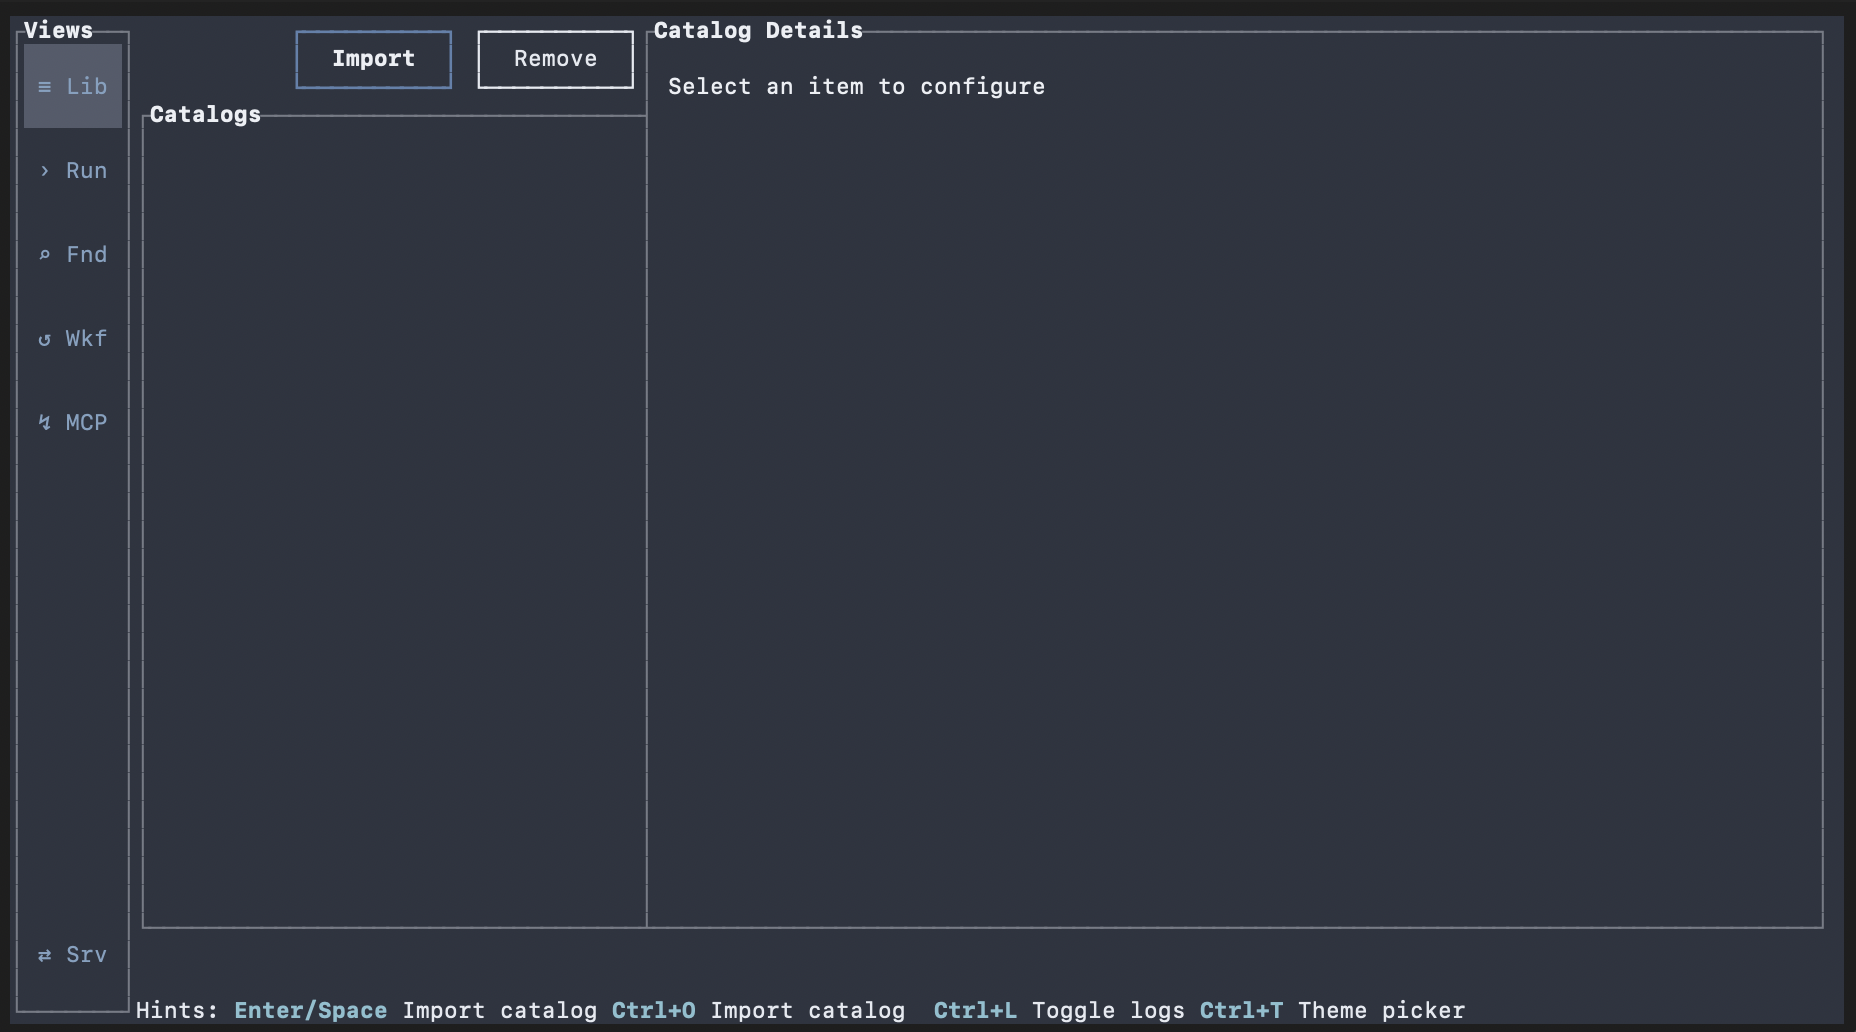
Import Your First Catalog
Open the Library and look for the Import button. Tab until it's focused, then press Enter or Space (or click with your mouse).
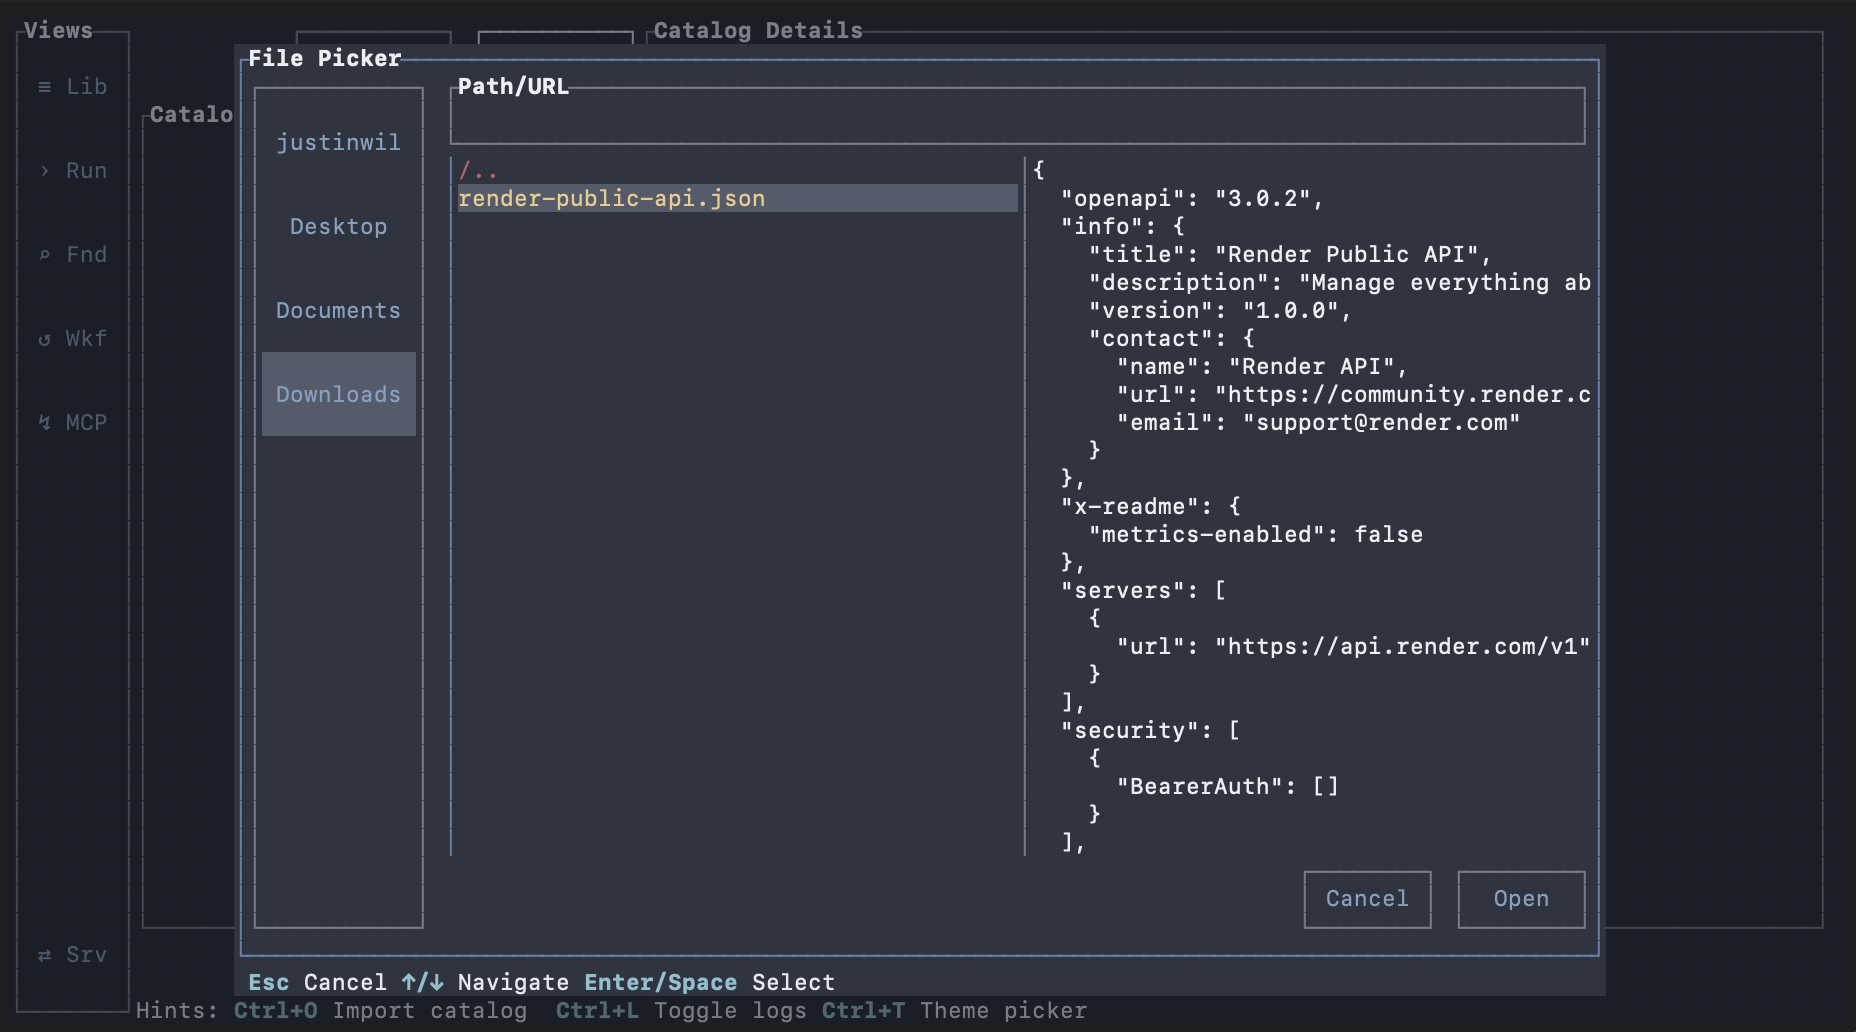
expected Oatty allows you to browse your filesystem or paste a URL and hit Enter or click the Open button to import.
recovery If import fails, verify the schema path/URL and format. Oatty currently supports OpenAPI v3 in both YAML and JSON formats. Retry import from Library, or run the CLI fallback to inspect errors.
fallback CLI import fallback: `oatty import <path-or-url> --kind catalog` (supports path and HTTP/HTTPS URL).
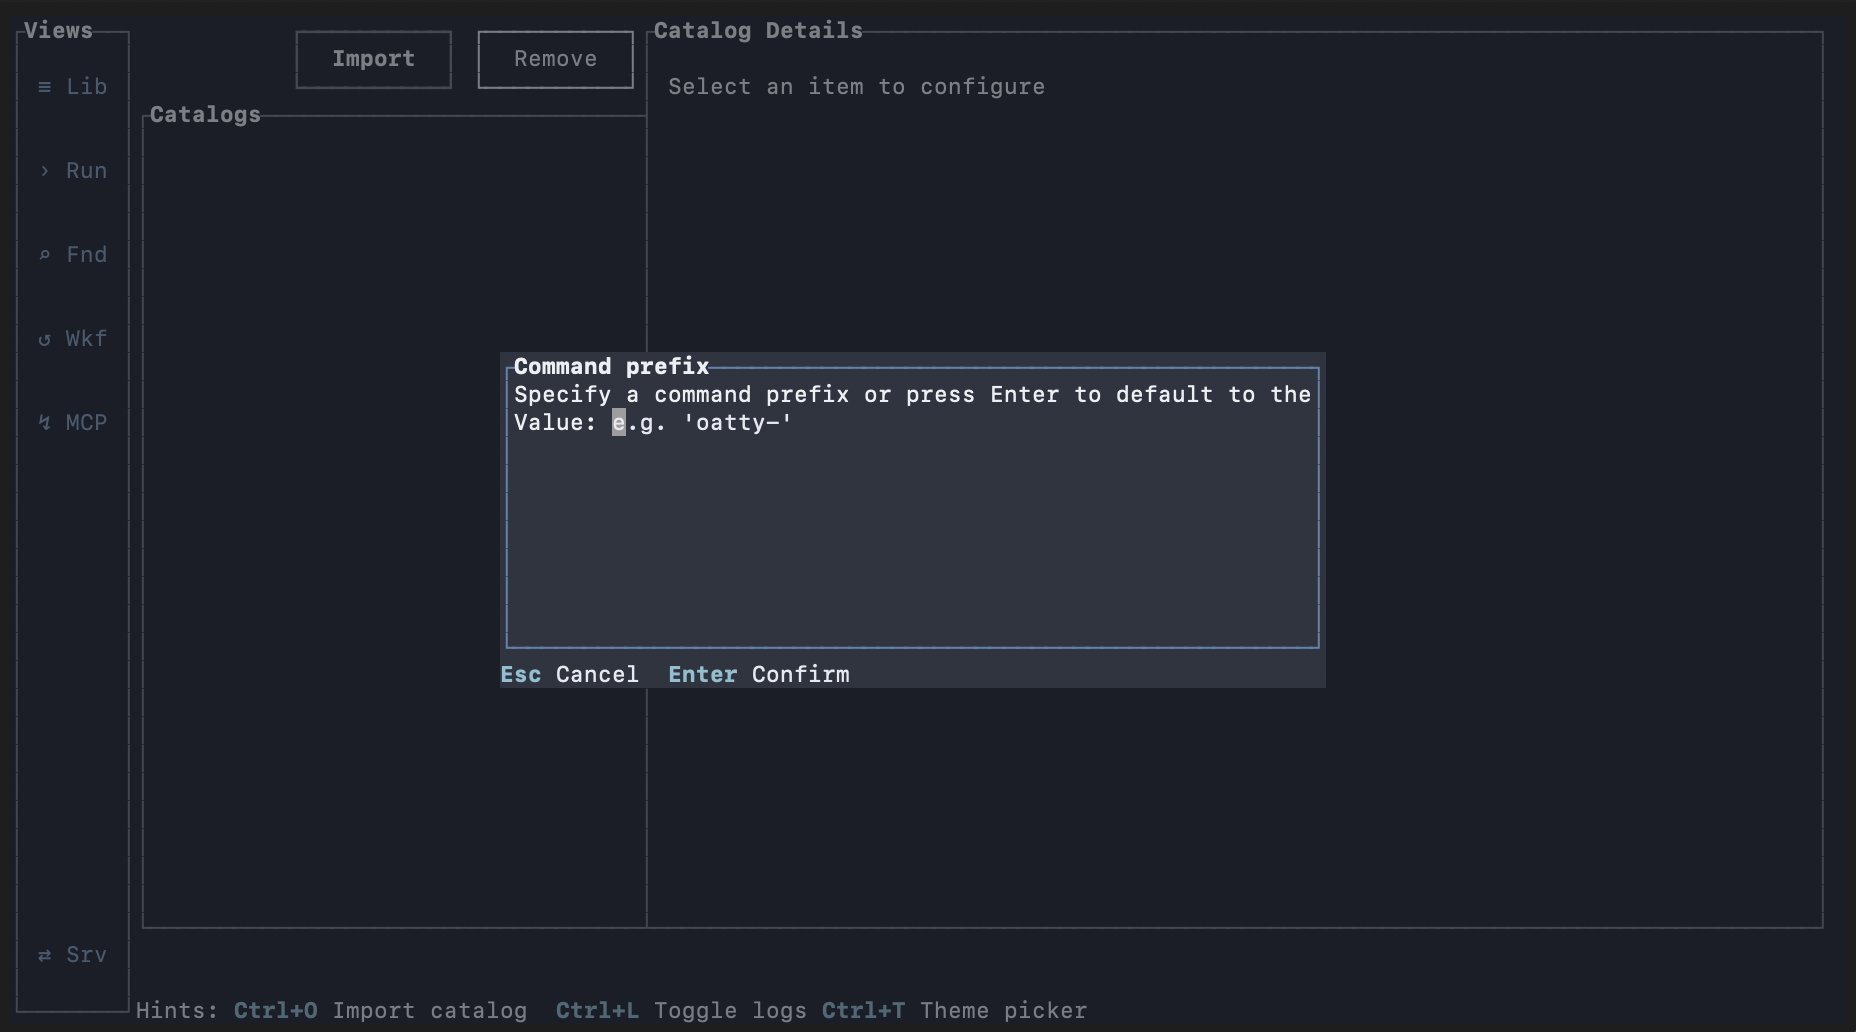
Optional Command Prefix
An optional custom command prefix dialog will appear after choosing a file or pasting a URL. This allows you to customize the command prefix for the imported catalog, which can be useful for organizing commands or avoiding conflicts with existing commands.
Skipping this step will derive the prefix from the schema directly.
expected An optional custom command prefix dialog will appear allowing you to customize the command prefix for the imported catalog.
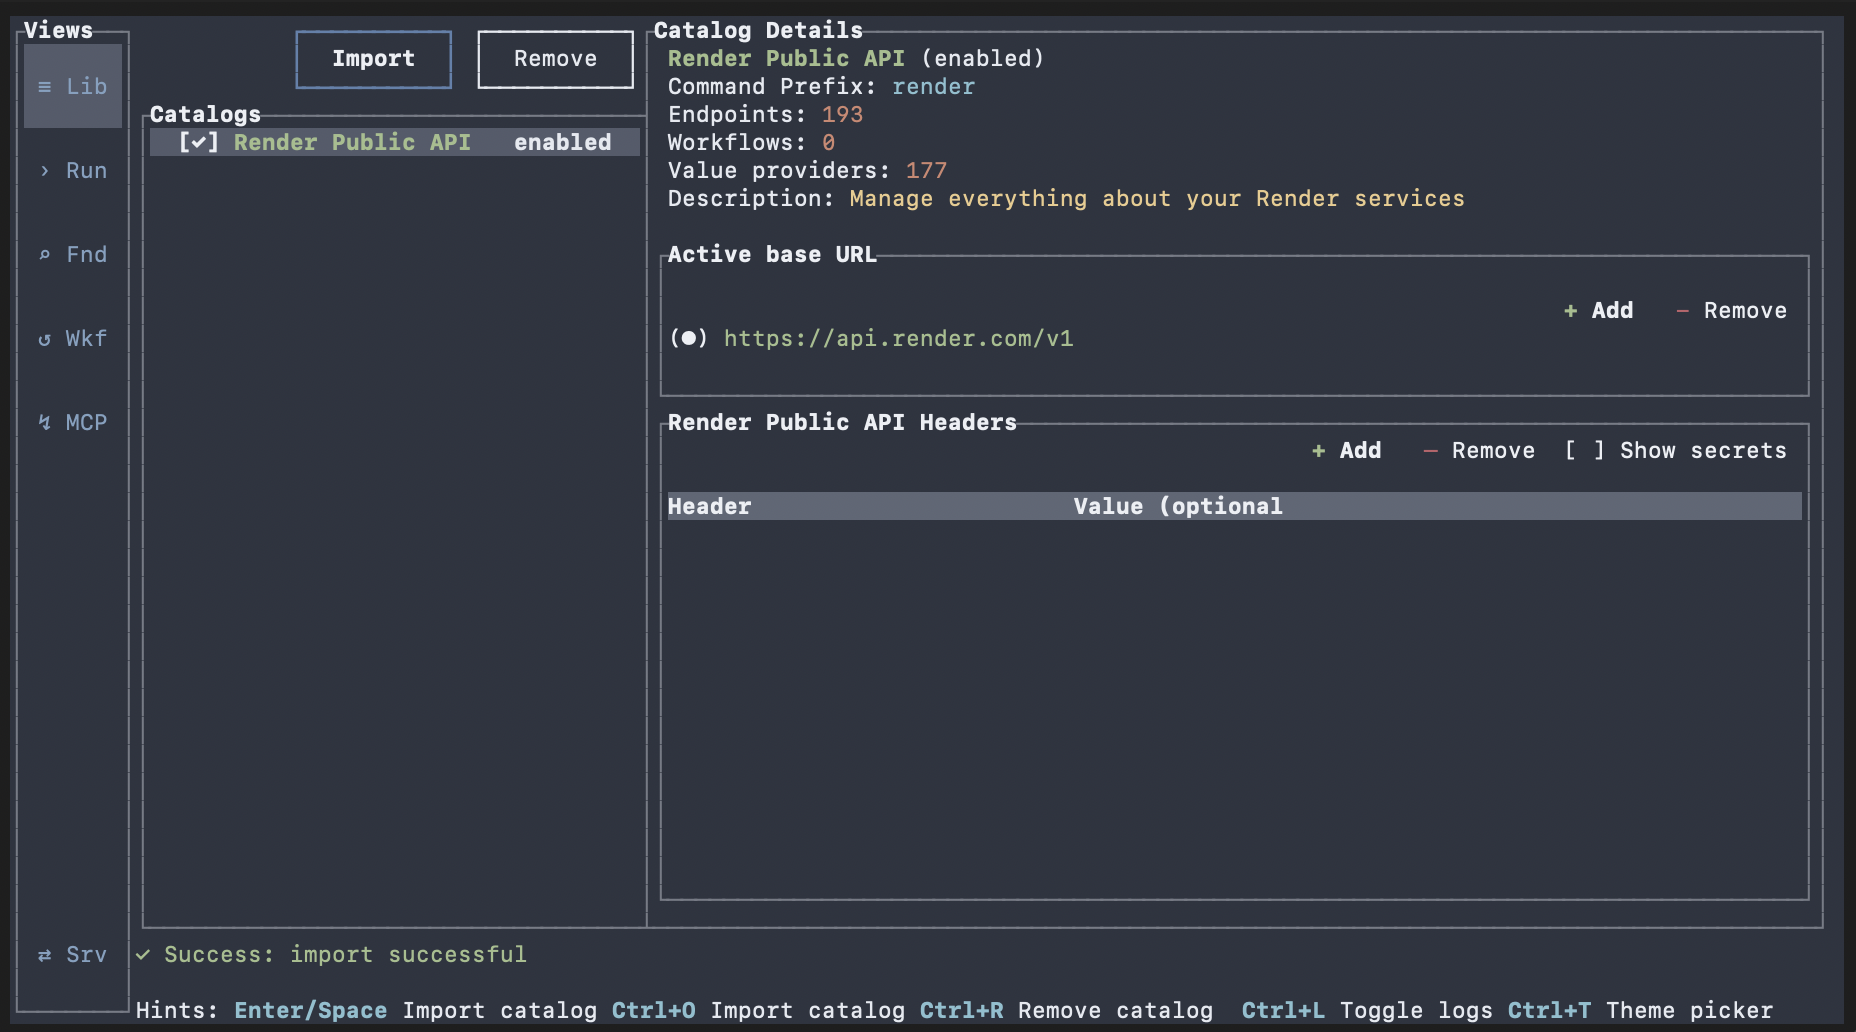
expected The Library view updates with the imported catalog and shows the summary of what was imported.
recovery If the custom prefix you enter is incorrect, you must remove the catalog and retry the import.
Complete Import
The import process will complete after you press Enter or click the Open button. The Library view will update with the imported catalog and populate the details panel.
recovery If the import fails, verify the schema path/URL and format. Oatty currently supports OpenAPI v3 in both YAML and JSON formats.
advanced Configuration management: Advanced flow: add/remove catalogs and manage base URLs in Library; this is covered in Learn: Library and Catalogs.
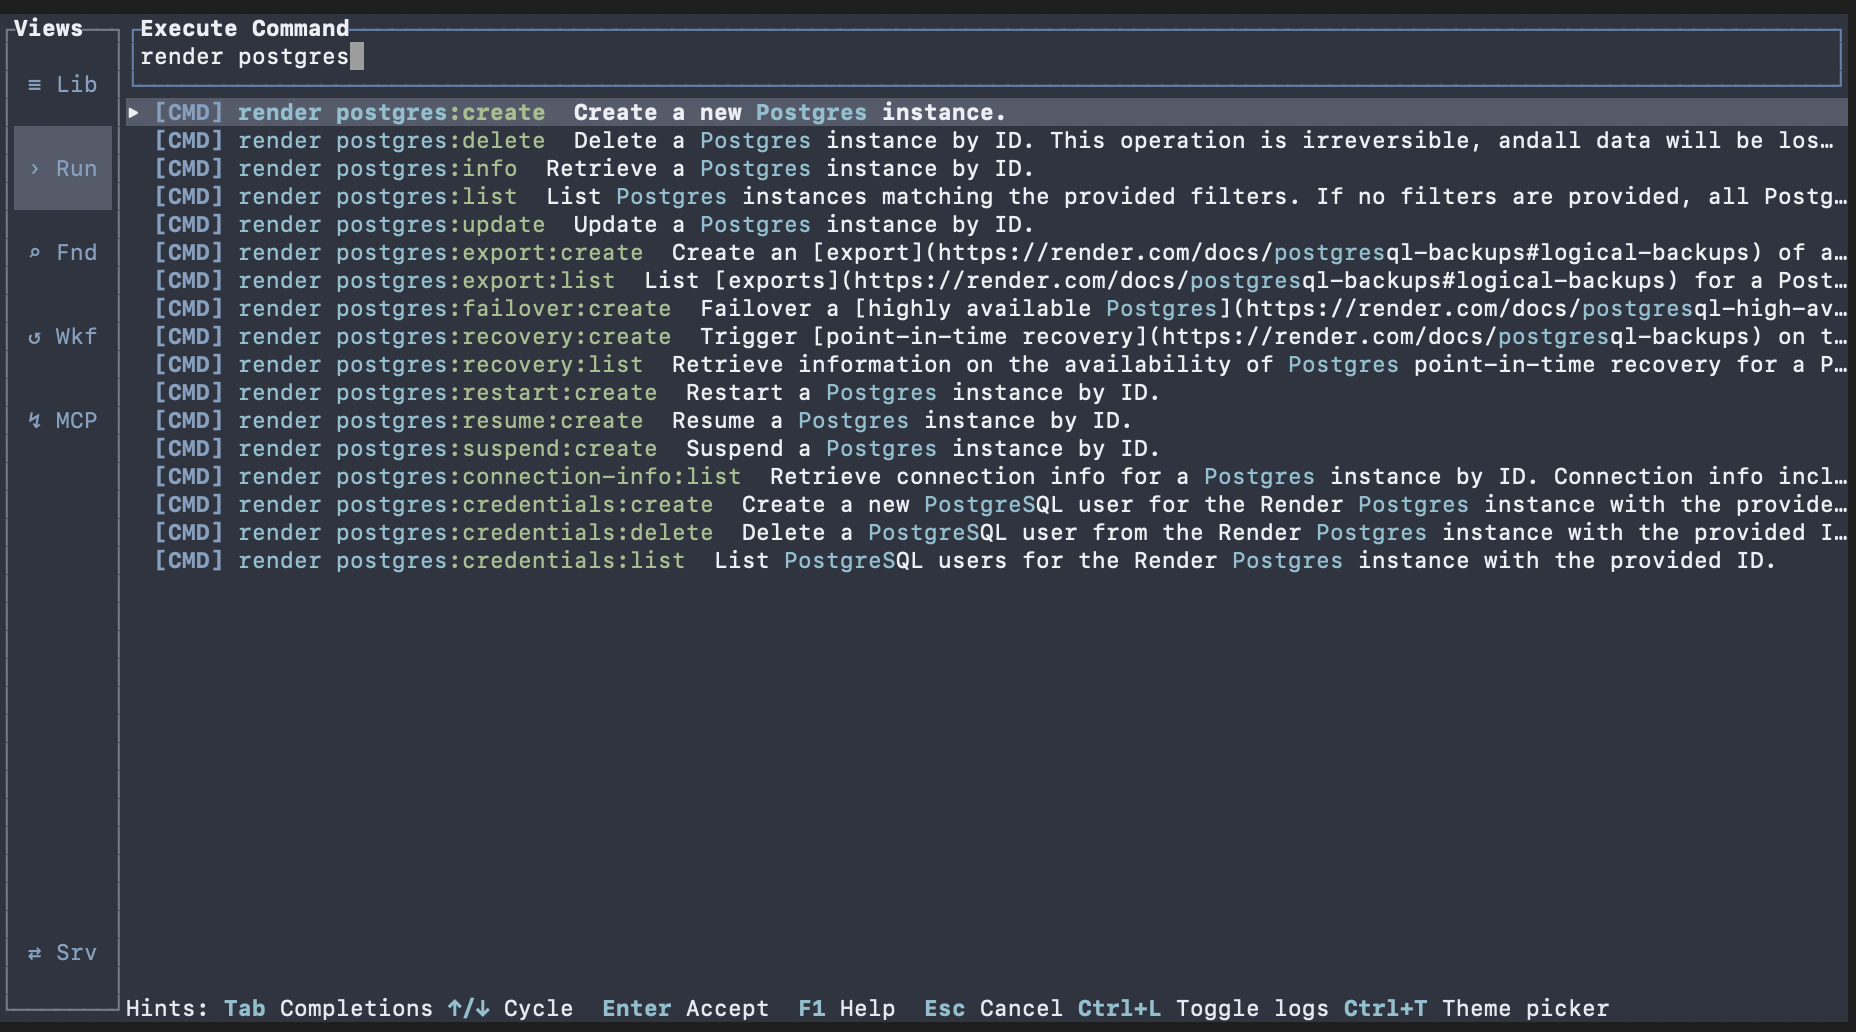
Discover and Run a Command
Open Run Command and type a search phrase. Matching commands appear as you type.
Select a command, then use Tab and Shift+Tab to move between inputs (flags and arguments) and enter values.
Execute the command and inspect JSON output, logs, and status in the UI.
expected Command execution completes and results/logs show the final status.
recovery If no command appears, confirm a catalog is imported. If execution fails, open command help and verify required inputs.
fallback CLI fallback for the same action: run the selected command directly with required flags/args.
recovery Command help: Read the help (Ctrl+h) for the command to understand required inputs and flags. Verify the Authorization header is configured and correct.
advanced Advanced discovery: For deeper discovery, use the Find/Browser view to inspect commands and send selected entries back to the runner.